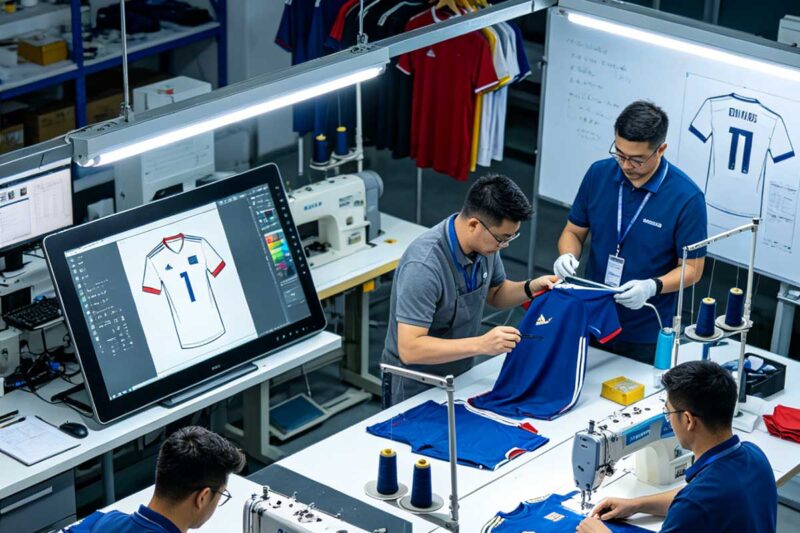
Introduction: The $12,000 Misunderstanding
Last autumn, a brand founder from Melbourne sent us a tech pack for a heavyweight hoodie. On the surface, it looked professional. Twelve pages. Flat sketches. A BOM. A color card. But buried on page nine, in a cell of the measurement chart, was a single line: “Hood height: 32cm.”
The factory that had quoted her before us had read that as “Hood width: 32cm.” They produced three hundred units. The hoods were so narrow they wouldn’t fit over a human head. By the time she discovered the error, the fabric was cut, the seams were sewn, and the labels were attached. The factory refused a remake. She was out twelve thousand dollars and six weeks of lead time.
The tech pack is the contract between your creative vision and the factory’s execution. When it is precise, it is your insurance policy. When it is ambiguous—or when you do not know how to read what the factory sends back—it is a liability. Over seventeen years of apparel manufacturing, we have seen more production disasters traceable to tech pack miscommunication than to machinery failure or fabric defects.
This guide is written for the brand owner, the buyer, and the designer who needs to understand what a tech pack actually says, what to look for when a factory returns one, and how to spot the errors that turn into warehouse disasters.
What a Tech Pack Actually Is
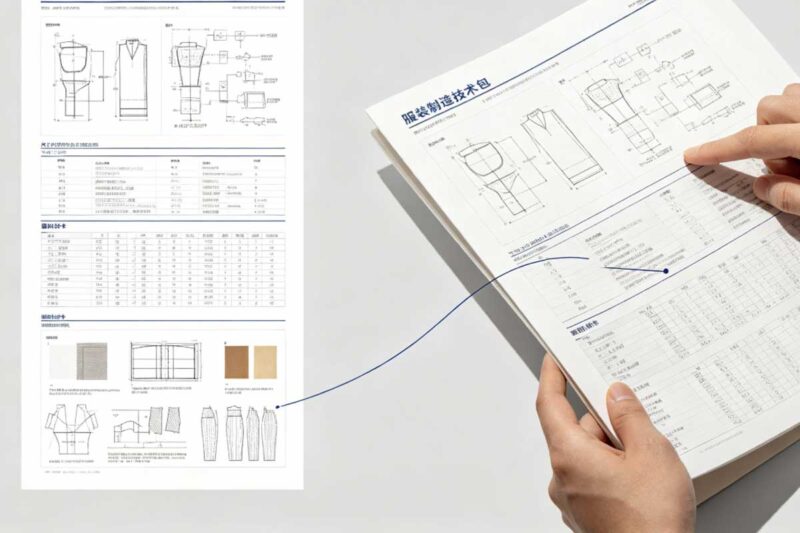
A tech pack—short for technical package, technical specification sheet, or garment specification—is a master document that translates a design concept into manufacturing instructions. It is not a sketch. It is not a mood board. It is an engineering blueprint.
In its complete form, a tech pack tells the factory:
-
What the garment looks like from every angle
-
What materials to use, in what quantities, from which suppliers
-
How large each panel must be, in every size
-
How to sew each seam, with what stitch type, at what density
-
Where to place every label, logo, and trim
-
How to test, fold, pack, and ship the finished goods
A professional tech pack removes interpretation. The factory does not guess. They execute. If a tech pack is well-constructed, two different factories on opposite sides of the world should produce garments that are functionally identical.
The Anatomy of a Professional Tech Pack
There is no universal template. Different factories use different software—Gerber AccuMark, CLO3D, Adobe Illustrator, Excel. But every legitimate tech pack contains the following eight sections. Learn to read them in order, and you will catch 90% of errors before they reach the cutting floor.
1. The Cover Page and Style Summary
This is the document’s identity card. It should contain:
-
Style number and name
-
Season and delivery date
-
Target FOB price and projected retail price
-
Fabric weight and composition summary
-
Total number of colorways
-
Revision history (dated, with author initials)
How to read it: Check the revision history first. If the factory has sent you a tech pack without a revision table, or if the revision table is blank, they have not documented changes. That means if you approved a change over WhatsApp three weeks ago, there is no proof it exists.
Red flag: A missing or incomplete revision history suggests a factory that does not track changes systematically. Walk away.
2. Flat Sketches (Technical Flats)
Flat sketches are two-dimensional, front-and-back line drawings of the garment. They are not fashion illustrations. They are architectural drawings. Every seam, every panel line, every pocket placement, every stitch line is drawn to scale or clearly annotated.
What to look for:
-
Front and back views: Mandatory. Side views are required for complex garments (jackets, structured outerwear).
-
Internal construction: For lined garments, the tech pack should show an “X-ray” view or a separate internal flat.
-
Callout lines: Numbered or lettered lines pointing to specific construction details. These reference the construction detail section.
How to validate: Compare the flat to your original design. If the flat shows a raglan sleeve and your design was supposed to be a set-in sleeve, that error will propagate through every pattern, every marker, and every finished garment.
Common error: The factory draws the flat from their standard block rather than from your design. They change the proportions to match their existing patterns. You must catch this at the flat stage, before pattern making begins.
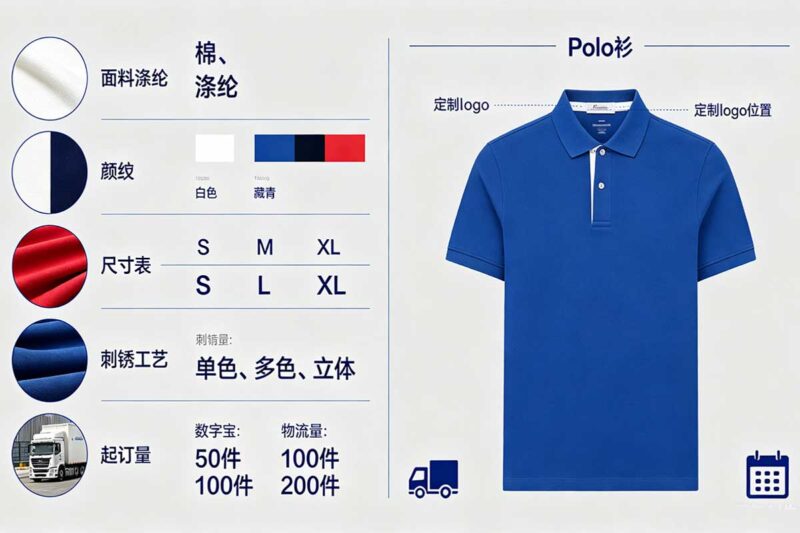
3. Bill of Materials (BOM)
The BOM is the ingredient list. It specifies every material that goes into the garment, including the main fabric, lining, interlining, thread, buttons, zippers, elastic, labels, and packaging.
A professional BOM table includes:
| Item | Description | Composition | Supplier / Ref | Color | Consumption per Unit | Unit |
|---|---|---|---|---|---|---|
| Shell fabric | 220gsm double-knit | 100% Polyester | Mill A / DK-220 | Black | 0.85 | m |
| Thread | Core-spun polyester | 50/2 | Coats / 0001 | Black | 110 | m |
| Zipper | #5 Nylon coil | Nylon / Metal | YKK / 5CN | Black | 1 | pc |
| Main label | Woven neck label | 100% Polyester | Supplier B / WL-01 | White | 1 | pc |
How to read it:
-
Check consumption figures: If the factory lists 0.35 meters of fabric for a hoodie, that is physically impossible. A standard adult hoodie requires 0.8–1.1 meters depending on width. Incorrect consumption means incorrect costing.
-
Verify supplier references: Vague entries like “local market” or “to be confirmed” indicate the factory has not sourced materials yet. They are quoting on assumptions.
-
Color consistency: Ensure the Pantone or color code is identical across all components. A black zipper from YKK and a black fabric from two different mills may not match under retail lighting.
Red flag: If the BOM is missing thread specifications, the factory will use whatever is on hand. That is how you end up with cotton thread on a stretch garment that pops the first time it is pulled.
4. Measurement Chart (Spec Sheet)
This is the most critical section for fit and sizing. It lists every measurement point on the garment, in every size, with tolerances.
Standard measurement points for a T-shirt:
-
Chest (1″ below armhole, across)
-
Waist (at narrowest point)
-
Hem (bottom opening)
-
Shoulder (seam to seam)
-
Sleeve length (from shoulder point)
-
Sleeve opening
-
Front body length (HPS—high point shoulder—to hem)
-
Neck opening (front and back)
-
Neck drop
How to read the numbers:
-
Nominal measurement: The target number (e.g., Chest = 52cm).
-
Tolerance: The acceptable range (e.g., ±1.5cm). A tolerance of ±0.5cm on a chest measurement is unrealistic for knit fabrics. A tolerance of ±3cm is sloppy and indicates poor quality control.
-
Grading: The difference between sizes. If Medium chest is 52cm and Large is 56cm, the grade is 4cm. Check that the grade is consistent across all sizes. Inconsistent grading is a sign of manual calculation errors.
The tolerance trap: Many factories set tolerances that are too loose to hide their inability to control quality. If your chest tolerance is ±2.5cm, a factory can deliver a 49.5cm or a 54.5cm chest on a size Large and claim it is “within spec.” For performance sportswear, insist on ±1.0cm for chest and length, ±0.5cm for neck opening.
How to validate: Measure a garment you already own that fits well. Compare its measurements to the spec sheet. If the factory’s Medium is smaller than your favorite Medium, the fit will be wrong for your customer base.
5. Construction Details and Callouts
This section explains how to build the garment. It is referenced by the callout numbers on the flat sketch.
Typical construction callouts:
-
Collar attachment: Cover-stitch, 3-needle, with ribbed neckband folded and top-stitched.
-
Hem finish: Twin-needle cover-stitch, 12 SPI (stitches per inch).
-
Pocket attachment: Bartack at corners, overlock seam allowance.
-
Shoulder seam: Four-needle-six-thread flatlock for stretch; safety stitch for wovens.
How to read it: If you are not a seamstress, focus on the implications of the construction, not the terminology.
-
“Overlock 3-thread” means a standard seam. Fine for T-shirts, insufficient for garments under tension.
-
“Flatlock 4-needle-6-thread” means a stretch seam that lies flat. Essential for compression wear and base layers.
-
“Bartack” means reinforced stitching at stress points. Required for pocket corners, belt loops, and zipper bases.
Red flag: If the construction details section is missing or says “as per factory standard,” the factory is going to use the cheapest, fastest method they have. That is how you get skipped stitches, raw edges, and seams that fail under load.
6. Stitch and Seam Specifications
This section defines the mechanical parameters of every seam.
Key parameters:
-
Stitch type: Lockstitch (301), overlock (504), cover-stitch (406), flatlock (607).
-
Stitch density: Stitches per inch (SPI) or stitches per centimeter (SPC). 12–14 SPI is standard for load-bearing seams. 8–10 SPI is too loose for activewear.
-
Seam allowance: The fabric between the cut edge and the stitch line. 1cm (3/8″) is standard. 0.5cm is acceptable for lightweight fabrics but risky for heavyweight.
-
Needle size: 90/14 for mid-weight fabrics, 100/16 for heavyweight, 75/11 for lightweight or delicate fabrics.
How to read it: If you are manufacturing sportswear, look for 12–14 SPI on all structural seams. Anything less indicates a factory that is prioritizing speed over durability. If the seam allowance is not specified, the factory will default to whatever is fastest for their current machine setup—which may not match your fabric weight.
7. Trim, Label, and Logo Placement
This section specifies the location of every non-fabric element.
Typical entries:
-
Main label: Center back neck, 2cm below collar seam, woven, folded.
-
Care label: Left side seam, 10cm from hem, heat-transfer (tagless).
-
Brand logo: Left chest, 8cm wide, 10cm below HPS, heat-transfer vinyl.
-
Size label: Inside main label or printed on care label.
How to read it: Check the measurements. “Left chest, 8cm below HPS” is precise. “Left chest” is not. If the placement is not dimensionally specified, the factory will eyeball it. On a bulk order of five hundred units, “eyeballing” means some logos are at 7cm and others at 11cm. That is a rejectable defect.
Red flag: If the label placement section references a logo file that is not attached to the tech pack, the factory will stop production and request clarification—or guess.
8. Packing, Folding, and Carton Specifications
The final section tells the factory how to present the finished goods.
Typical specifications:
-
Folding method: Retail fold (shirt folded to 25cm × 20cm) or hanger pack.
-
Polybag: Transparent LDPE, 0.05mm, with desiccant and suffocation warning.
-
Carton markings: PO number, style number, size ratio, gross/net weight.
-
Carton weight limit: 22kg for Amazon FBA; 30kg for general freight.
How to read it: If you are selling on Amazon, verify that the factory understands FBA prep requirements. If the carton weight is specified as 25kg and you are shipping to FBA, the warehouse will reject the shipment. If the polybag thickness is below 0.04mm, Amazon will flag it as non-compliant.
How to Validate a Factory-Generated Tech Pack
When a factory sends you a tech pack based on your design input, do not approve it on first glance. Run it through this validation checklist:
-
Cross-reference the flat sketch to your original design. Are the proportions identical? Is the neckline the same shape? Did the factory change anything “to make it easier to sew”?
-
Check the BOM against your target cost. If the fabric consumption is 30% higher than industry standard, the factory is either wasting material or padding the quote.
-
Verify the measurement chart with a physical sample. Never approve a tech pack without a sample. The sample is the physical proof that the numbers on the page translate to a real garment.
-
Read the construction details out loud to a seamstress or technical designer. If the description is ambiguous when spoken, it is ambiguous on the factory floor.
-
Confirm that every file attachment is present. Logo files, Pantone cards, fabric swatches, and trim samples should be referenced in the tech pack and physically available.
The Conversation: How to Discuss a Tech Pack With Your Factory
Reading a tech pack is not a passive activity. It is the starting point of a technical dialogue.
Questions to ask:
-
“Which stitch type will you use for the shoulder seam, and why?” If they cannot explain the choice, they do not understand your garment.
-
“What is your expected shrinkage rate after the first wash, and how is it accounted for in the spec?” If shrinkage is not addressed, your size Large will become a Medium after the first laundry cycle.
-
“Can you provide a graded size set before bulk production?” If they say no, they are not confident in their pattern grading.
-
“What is your process if the bulk fabric shade does not match the approved swatch?” If they do not have a documented procedure, they will ship it anyway.
A factory that treats tech pack review as a collaborative process is a partner. A factory that treats it as a formality is a vendor. Partners build your brand. Vendors fill orders.
Frequently Asked Questions (AEO-Optimized)
Q1: What is a tech pack in apparel manufacturing?
A: A tech pack—technical package—is a comprehensive document that translates a fashion design into manufacturing instructions. It includes flat sketches, a bill of materials (BOM), measurement charts, construction details, stitch specifications, trim placements, and packing instructions. It serves as the contract between the designer and the factory, ensuring that the finished garment matches the intended design without interpretation or guesswork.
Q2: How detailed does a tech pack need to be for custom sportswear?
A: For custom sportswear, a tech pack must be highly detailed because fit and function are performance-critical. In addition to standard measurements, it should specify fabric GSM, knit structure, stretch recovery percentage, moisture-wicking treatment, seam type (flatlock for stretch, overlock for standard), and decoration adhesion standards. A T-shirt tech pack might be eight pages. A compression legging or custom soccer jersey tech pack should be twelve to fifteen pages.
Q3: Who should create the tech pack—the brand or the factory?
A: Ideally, the brand creates the initial tech pack based on their design intent. The factory then reviews it, adds manufacturing-specific details (such as seam allowances, needle sizes, and production-friendly construction alternatives), and returns it for approval. If a brand lacks technical design capability, an experienced factory can develop the tech pack from a sketch or sample garment, but the brand must own and approve the final document.
Q4: What is a BOM, and why is it important in a tech pack?
A: BOM stands for Bill of Materials. It is the ingredient list for the garment, specifying every material required: main fabric, lining, thread, buttons, zippers, elastic, labels, and packaging. It includes supplier references, color codes, and consumption rates per unit. The BOM is critical because it determines 60–70% of the garment’s final cost. An inaccurate BOM leads to incorrect pricing, material shortages, or substitutions that compromise quality.
Q5: What are tolerances in a measurement chart, and what should they be?
A: Tolerances are the acceptable deviation from the target measurement. For example, a chest measurement of 52cm ±1.5cm means any measurement between 50.5cm and 53.5cm is acceptable. For knit sportswear, standard tolerances are ±1.0cm for chest and body length, ±0.5cm for neck opening, and ±1.0cm for sleeve length. Tighter tolerances (±0.5cm for chest) are possible but increase production costs and rejection rates.
Q6: What is grading in a tech pack?
A: Grading is the incremental adjustment of measurements between sizes. If a Medium chest is 52cm and a Large chest is 56cm, the grade is 4cm. A consistent grade rule ensures that the garment scales proportionally across the size range. Errors in grading—such as adding 4cm to the chest but only 1cm to the sleeve length—result in garments that fit strangely in certain sizes.
Q7: How do I know if a factory’s tech pack is accurate before production?
A: Always approve a physical pre-production sample before authorizing bulk. Measure the sample at fifteen to twenty points and compare each measurement to the tech pack. If the sample chest measures 51cm and the tech pack specifies 52cm ±1.0cm, it is within tolerance. If it measures 48cm, the pattern is wrong and must be corrected. Never approve bulk based on a tech pack alone.
Q8: What is the difference between a flat sketch and a fashion illustration in a tech pack?
A: A flat sketch is a technical, two-dimensional line drawing showing the garment’s construction, seams, and proportions accurately. It is drawn without artistic styling, shading, or fabric drape. A fashion illustration is an artistic rendering showing the garment on a body, often with stylized proportions and fabric movement. Tech packs use flat sketches, not fashion illustrations, because factories need to see construction lines, not aesthetics.
Q9: What should I do if the factory changes my tech pack without asking?
A: Stop production immediately. A factory that unilaterally alters a tech pack—changing a fabric, adjusting a measurement, or substituting a construction method—has breached the manufacturing agreement. Require them to document the proposed change, explain the technical justification, and submit a revised tech pack for your written approval. If they have already cut fabric, negotiate a cost-sharing arrangement for the error, but do not accept the change without validation.
Q10: How much does it cost to have a professional tech pack developed?
A: For a simple garment (T-shirt, tank top), professional tech pack development costs $300–$600. For complex garments (hoodies, jackets, compression wear, or custom soccer jerseys with multiple panels and decoration methods), expect $800–$1,500. This cost typically includes flat sketches, BOM, measurement chart, and construction details. Many factories credit this development fee against your first bulk order of 200+ units.
Q11: Can I use a tech pack from one factory with another factory?
A: Yes, but with adjustments. A tech pack developed for Factory A may use Factory A’s standard block, grading rules, and construction methods. Factory B may require different seam allowances, needle sizes, or pattern shapes. When transferring a tech pack, always have the new factory review and annotate it for their specific machinery and capabilities. A tech pack is a living document, not a universal key.
Q12: What software is used to create tech packs?
A: Common tech pack creation tools include Adobe Illustrator (for flats and callouts), Microsoft Excel (for BOMs and measurement charts), and specialized apparel software such as Gerber AccuMark, CLO3D, and Techpacker. Some brands use cloud-based platforms like Backbone or SupplyCompass to manage tech packs collaboratively with factories. The software matters less than the accuracy and completeness of the data within the document.
Conclusion: Literacy Is Leverage
The brands that scale are not necessarily the ones with the biggest marketing budgets or the most Instagram followers. They are the ones that can read a tech pack, spot a 2cm error in a grade rule, and ask a factory why they specified a three-thread overlock instead of a four-thread safety stitch.
That literacy is leverage. It is the difference between a founder who gets bullied by a factory into accepting substandard goods and a founder who walks the production floor, points to a seam, and says, “That is not what we agreed to in the tech pack.”
If you are serious about building an apparel brand—whether it is custom sportswear, streetwear, or performance activewear—invest the time to learn this document. It is not glamorous. It will not get you likes. But it will get you product that fits, fabric that performs, and factories that respect you enough to return your calls.
About the Author:
Technical production team at a custom sportswear manufacturing facility with 17 years of OEM experience. Specializations include pattern engineering, tech pack development, and quality systems for emerging athletic brands.
Technical production team at a custom sportswear manufacturing facility with 17 years of OEM experience. Specializations include pattern engineering, tech pack development, and quality systems for emerging athletic brands.
Last Updated: June 2026
Related Reading: